This is the second article in the series of AIP label creation and configuration. If you have not created an AIP label, please read our article on how to do so.
Configuring a Label Policy
A label policy is required to push out labels to users or groups in your organization in order for labels to be seen and applied.
1. Locate label policies
Navigate to the Label policies tab and select Publish label (Figure 1).
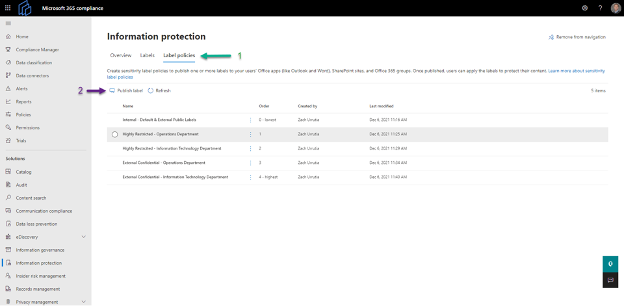
Figure 1
2. Select label to publish
Once completing step one, a sidebar will appear on the right side of the screen. Choose which label(s) to publish (Figure 2) from the list in the sidebar.
Note: You can have more than one label in a single label policy.
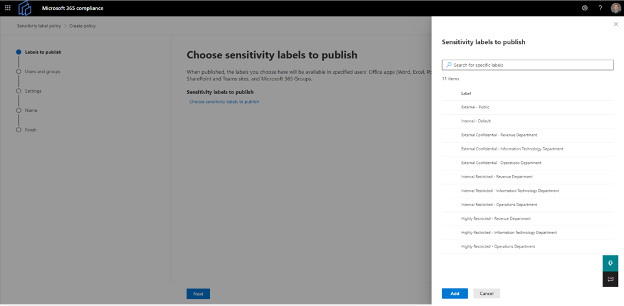
Figure 2
3. Select users or groups to publish
Once selecting the label(s) to publish, choose which users or groups the label(s) will be published to. These users or group members will be able to see and apply the label on their Outlook emails and/ or Office documents depending on the settings of your label (Figure 3).
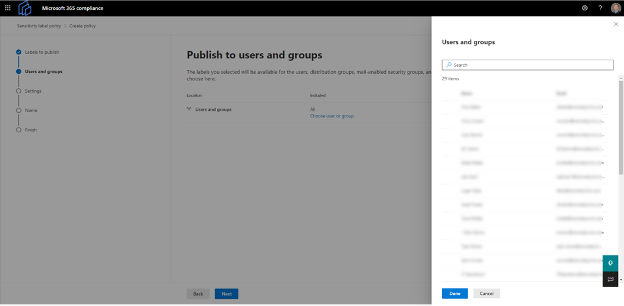
Figure 3
4. Configure label settings
Users must provide a justification for removing a label or lowering its classification (Figure 4).
- Label priority is important as it determines the level of classification. The higher the number, the higher priority it has. Therefore, a high priority is most restrictive, and low classification number correlates to a less restrictive policy.
- You can require users in your organization to apply a label to Office documents and Outlook emails before saving or sending them.
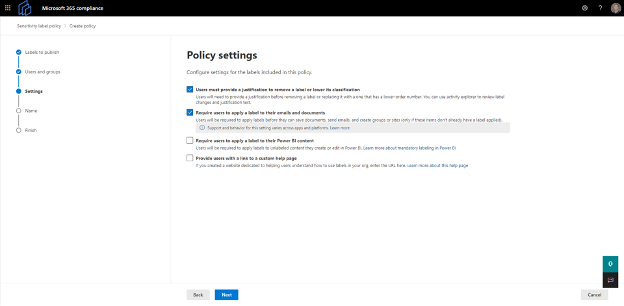
Figure 4
5. Apply a default label to documents
Once your label settings are configured, you will be prompted to configure the label as the default label to be applied to all Office documents (Figure 5).
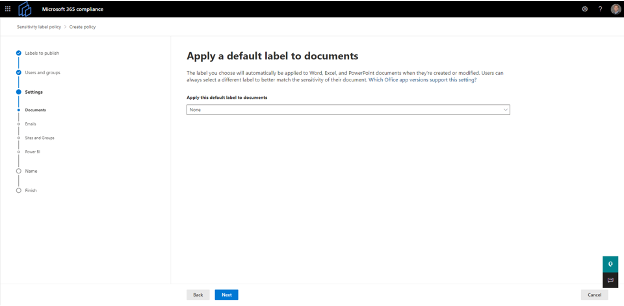
Figure 5
6. Apply a default label to emails
Once you've configured your default label for documents, you will be prompted to configure the label as the default label to be applied to all Outlook emails (Figure 6).
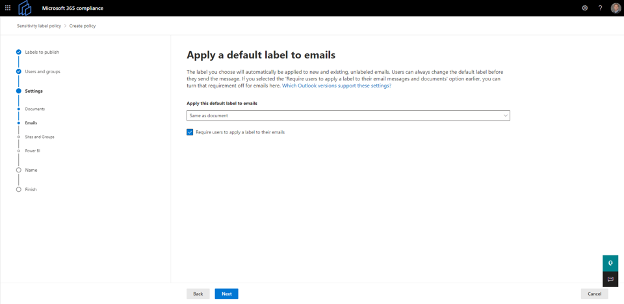
Figure 6
7. Name your policy
Lastly, you will be prompted to give the label policy a name and description (Figure 7).
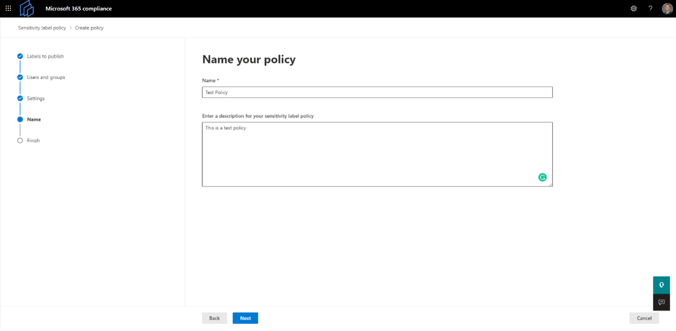
Figure 7
8. Review settings and submit
Lastly, review your configuration to ensure that all settings are correct. Once you've reviewed and confirmed that all settings are correct, select the submit button (Figure 8).
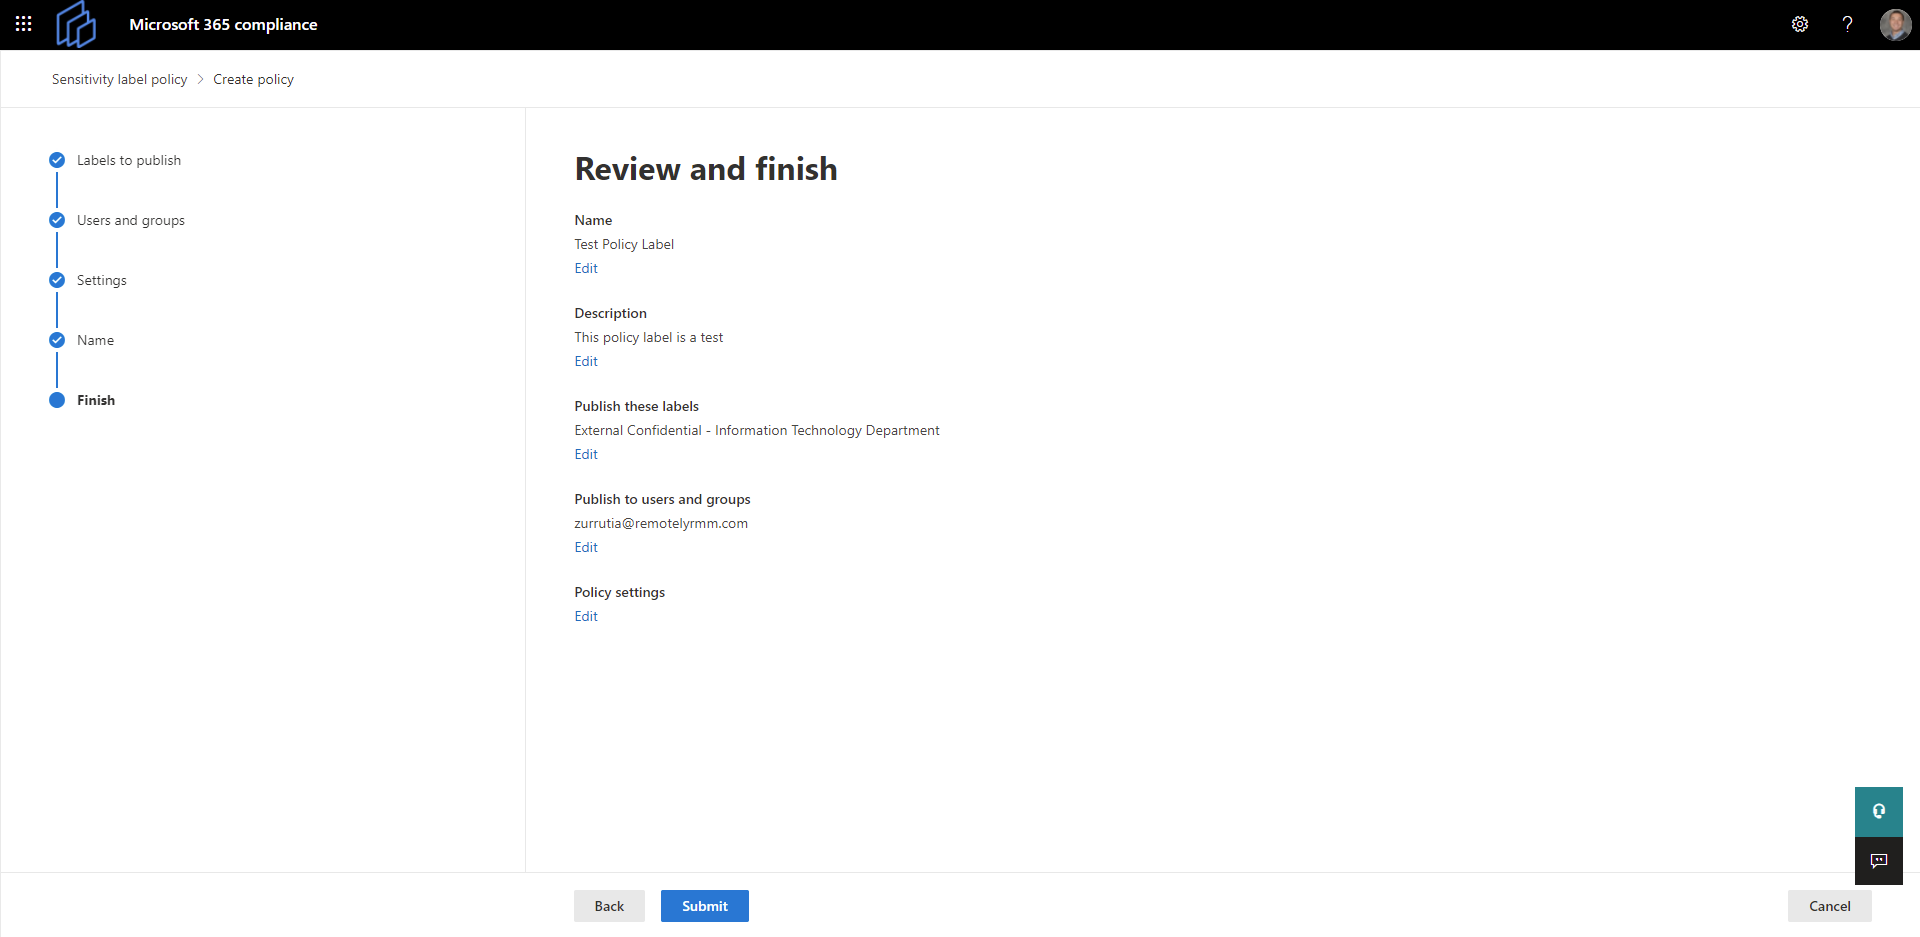
Figure 8
Congratulations! You've successfully created an Azure Information Protection label as well as a label policy to out your newly created label to users and groups. Per Microsoft documentation, "Labels can take up to 24 hours to be fully published and ready to use by your organization after creation."
No Comments Yet
Let us know what you think