How to create an Azure Information Protection Label
by Zach Urrutia on December 9, 2021
Azure information Protection (AIP) is a cloud-based classification system that offers organizations the ability to set an array of protection limits to documents and emails by applying labels. Please refer to Microsoft's documentation for more information on AIP and AIP labels.
All AIP labels are created and managed in the Microsoft Compliance center. Do note that your tenant must have either Azure Information Protection P1 license or Office 365 E3/E5 licenses (you do not need both).
Note: There are labels; that define which resources have restricted, protected access, and there are label policies; where you define who can see and apply the labels you have created. The label policy pushes out the restrictions configured in the label to certain M365 Groups
Creating and configuring a label
1. Locate information protection
Once at the home screen of the Microsoft Compliance center, click on the Information Protection located on the left side of the screen. You are now in the correct location to begin creating labels for your organization (Figure 1).
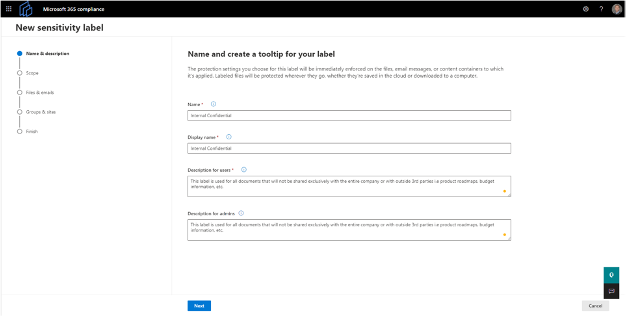
2. Name and create tooltip for label
You will need to create a name and tooltip for the label. You'll be required to enter the following information (Figure 2):
- Name: For admins in the Compliance center
- Display name: What your users will see when the label is pushed out via Label Policy
- Admin description: An explanation of the label intended for admin use
- User description: An explanation of the label intended for users
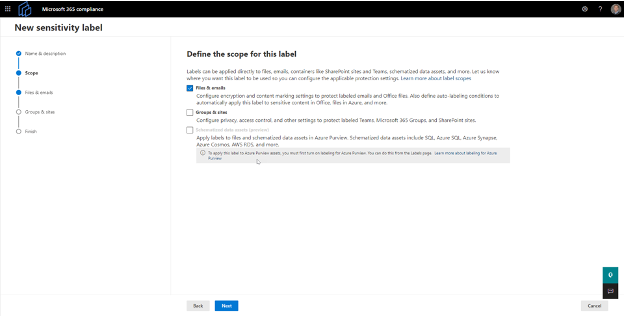
3. Define the scope for your label
Once the tooltip and label are created, you will need to define the scope for your label. The purpose of this step is to define what type of content the label can be applied to (Figure 3). The two available options are:
- Files & emails
- Office application documents
- Outlook emails
- Groups & sites
- Teams
- SharePoint site
In this tutorial, we are going to focus on the Files & emails definition.
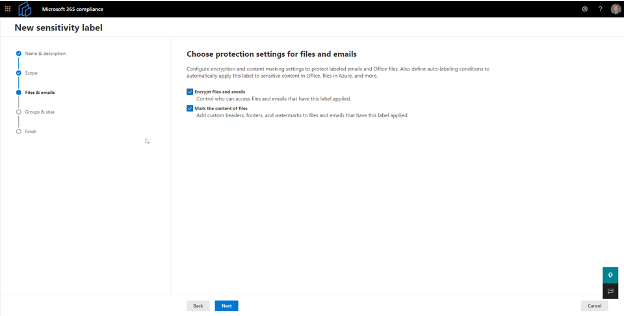
4. Configure encryption settings
Next, you will be configuring the settings for encrypting files & emails. Additionally, this step accounts for setting contenting marking (watermark, header, footer) should your organization require the settings (Figure 4).
Note: content marking is optional, but may be recommended for highly confidential data.
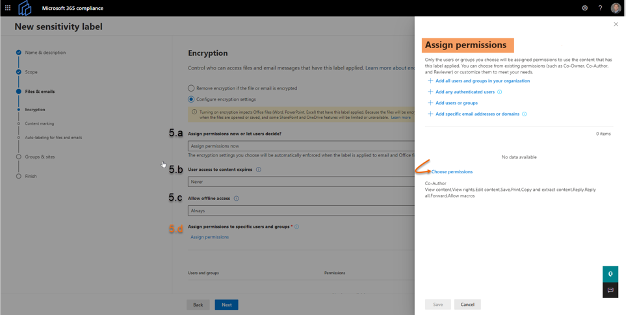
5. Additional encryption settings
You can leave your Configure encryption settings as default for most cases unless you need any of the following:
- Assign permissions now or let users decide: Allows users to determine the permissions when applying the label to content
- User access if content expires: Define the duration of user-access to the document the label is being applied to. If a date is specified, the time begins when the label is being applied to the document
- Allow offline access: Determine if offline access is enabled. If disabled, users must be authenticated and their access is logged
- Assign permissions to users and groups: Define which groups or users have access when this specific label is applied to content
- Choose permissions: Determine the type of permissions the group or users have access to
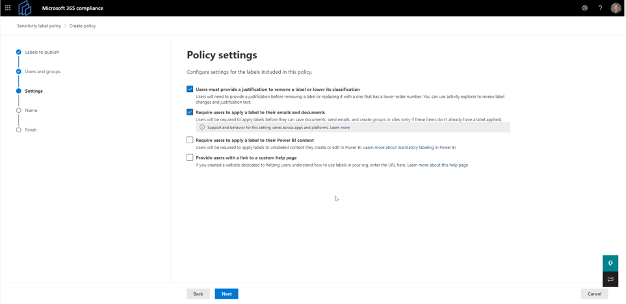
6. Configure policy settings
This step allows for the configuration of content marketing policy settings. The settings can be configured either by watermark, header, or footer (Figure 6).
7. Conditional label application
After policy settings have been set, you will be prompted to set permissions on labels to either:
- Apply labels to Office files if certain content conditions are matched
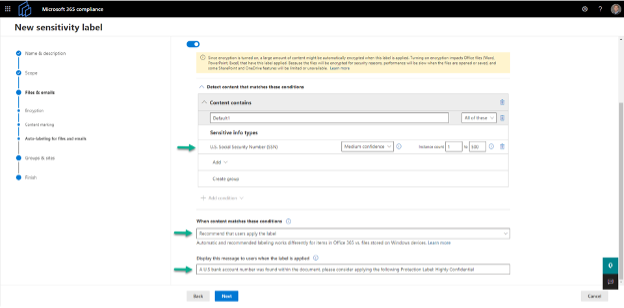
- Display a recommendation that users apply a label if certain content conditions are matched
For example, the screenshot below shows the settings in a highly confidential protection label recommending the user of the label because a US bank account number was found within the document (Figure 7).
8. Review settings and submit
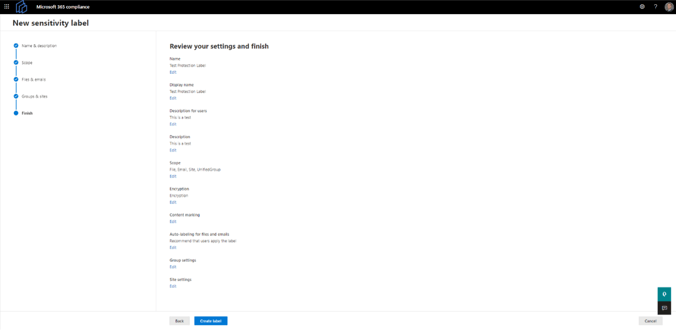
Lastly, review your new sensitivity label to ensure that all settings are correct. Once you've reviewed and confirmed all settings are correct, select Create label (Figure 8).
You have now successfully created an Azure Information Protection label. Please note that users in your organization will not be able to view or apply this label to their content until you have created a Label policy.
Learn how to create a Label policy in our next article.
Built on Azure. Built for Azure.
- Cyber Security (16)
- Security (15)
- Azure (10)
- Cyberattack (10)
- IT Operations Management (10)
- Remote Monitoring and Management (10)
- AIP (9)
- IT Strategy (9)
- Remote Work (9)
- Asset Management (7)
- IT Operations (6)
- Asset Inventory (5)
- Reliability (5)
- Remotely Interesting (5)
- Risk Management Framework (5)
- Azure Migration (4)
- Microsoft Secure Score (4)
- Office 365 (4)
- Security Risk Index (4)
- Customer Success (3)
- GRC (3)
- Risk Dashboard (3)
- Support (3)
- Powershell (2)
- First Steps (1)
- Migrate (1)
- System Requirements (1)
- Virtual Machine (1)
- Zero Trust (1)
- August 1, 2023 (1)
- July 1, 2023 (2)
- May 1, 2023 (1)
- March 1, 2023 (2)
- February 1, 2023 (1)
- January 1, 2023 (1)
- December 1, 2022 (2)
- November 1, 2022 (2)
- October 1, 2022 (1)
- September 1, 2022 (2)
- August 1, 2022 (1)
- July 1, 2022 (1)
- June 1, 2022 (2)
- May 1, 2022 (4)
- April 1, 2022 (3)
- March 1, 2022 (2)
- February 1, 2022 (2)
- January 1, 2022 (1)
- December 1, 2021 (4)
- November 1, 2021 (1)
- October 1, 2021 (1)
.png?width=50&height=50&name=Untitled%20(50%20%C3%97%2050%20px).png)


No Comments Yet
Let us know what you think